Salted Honeycomb Cookies
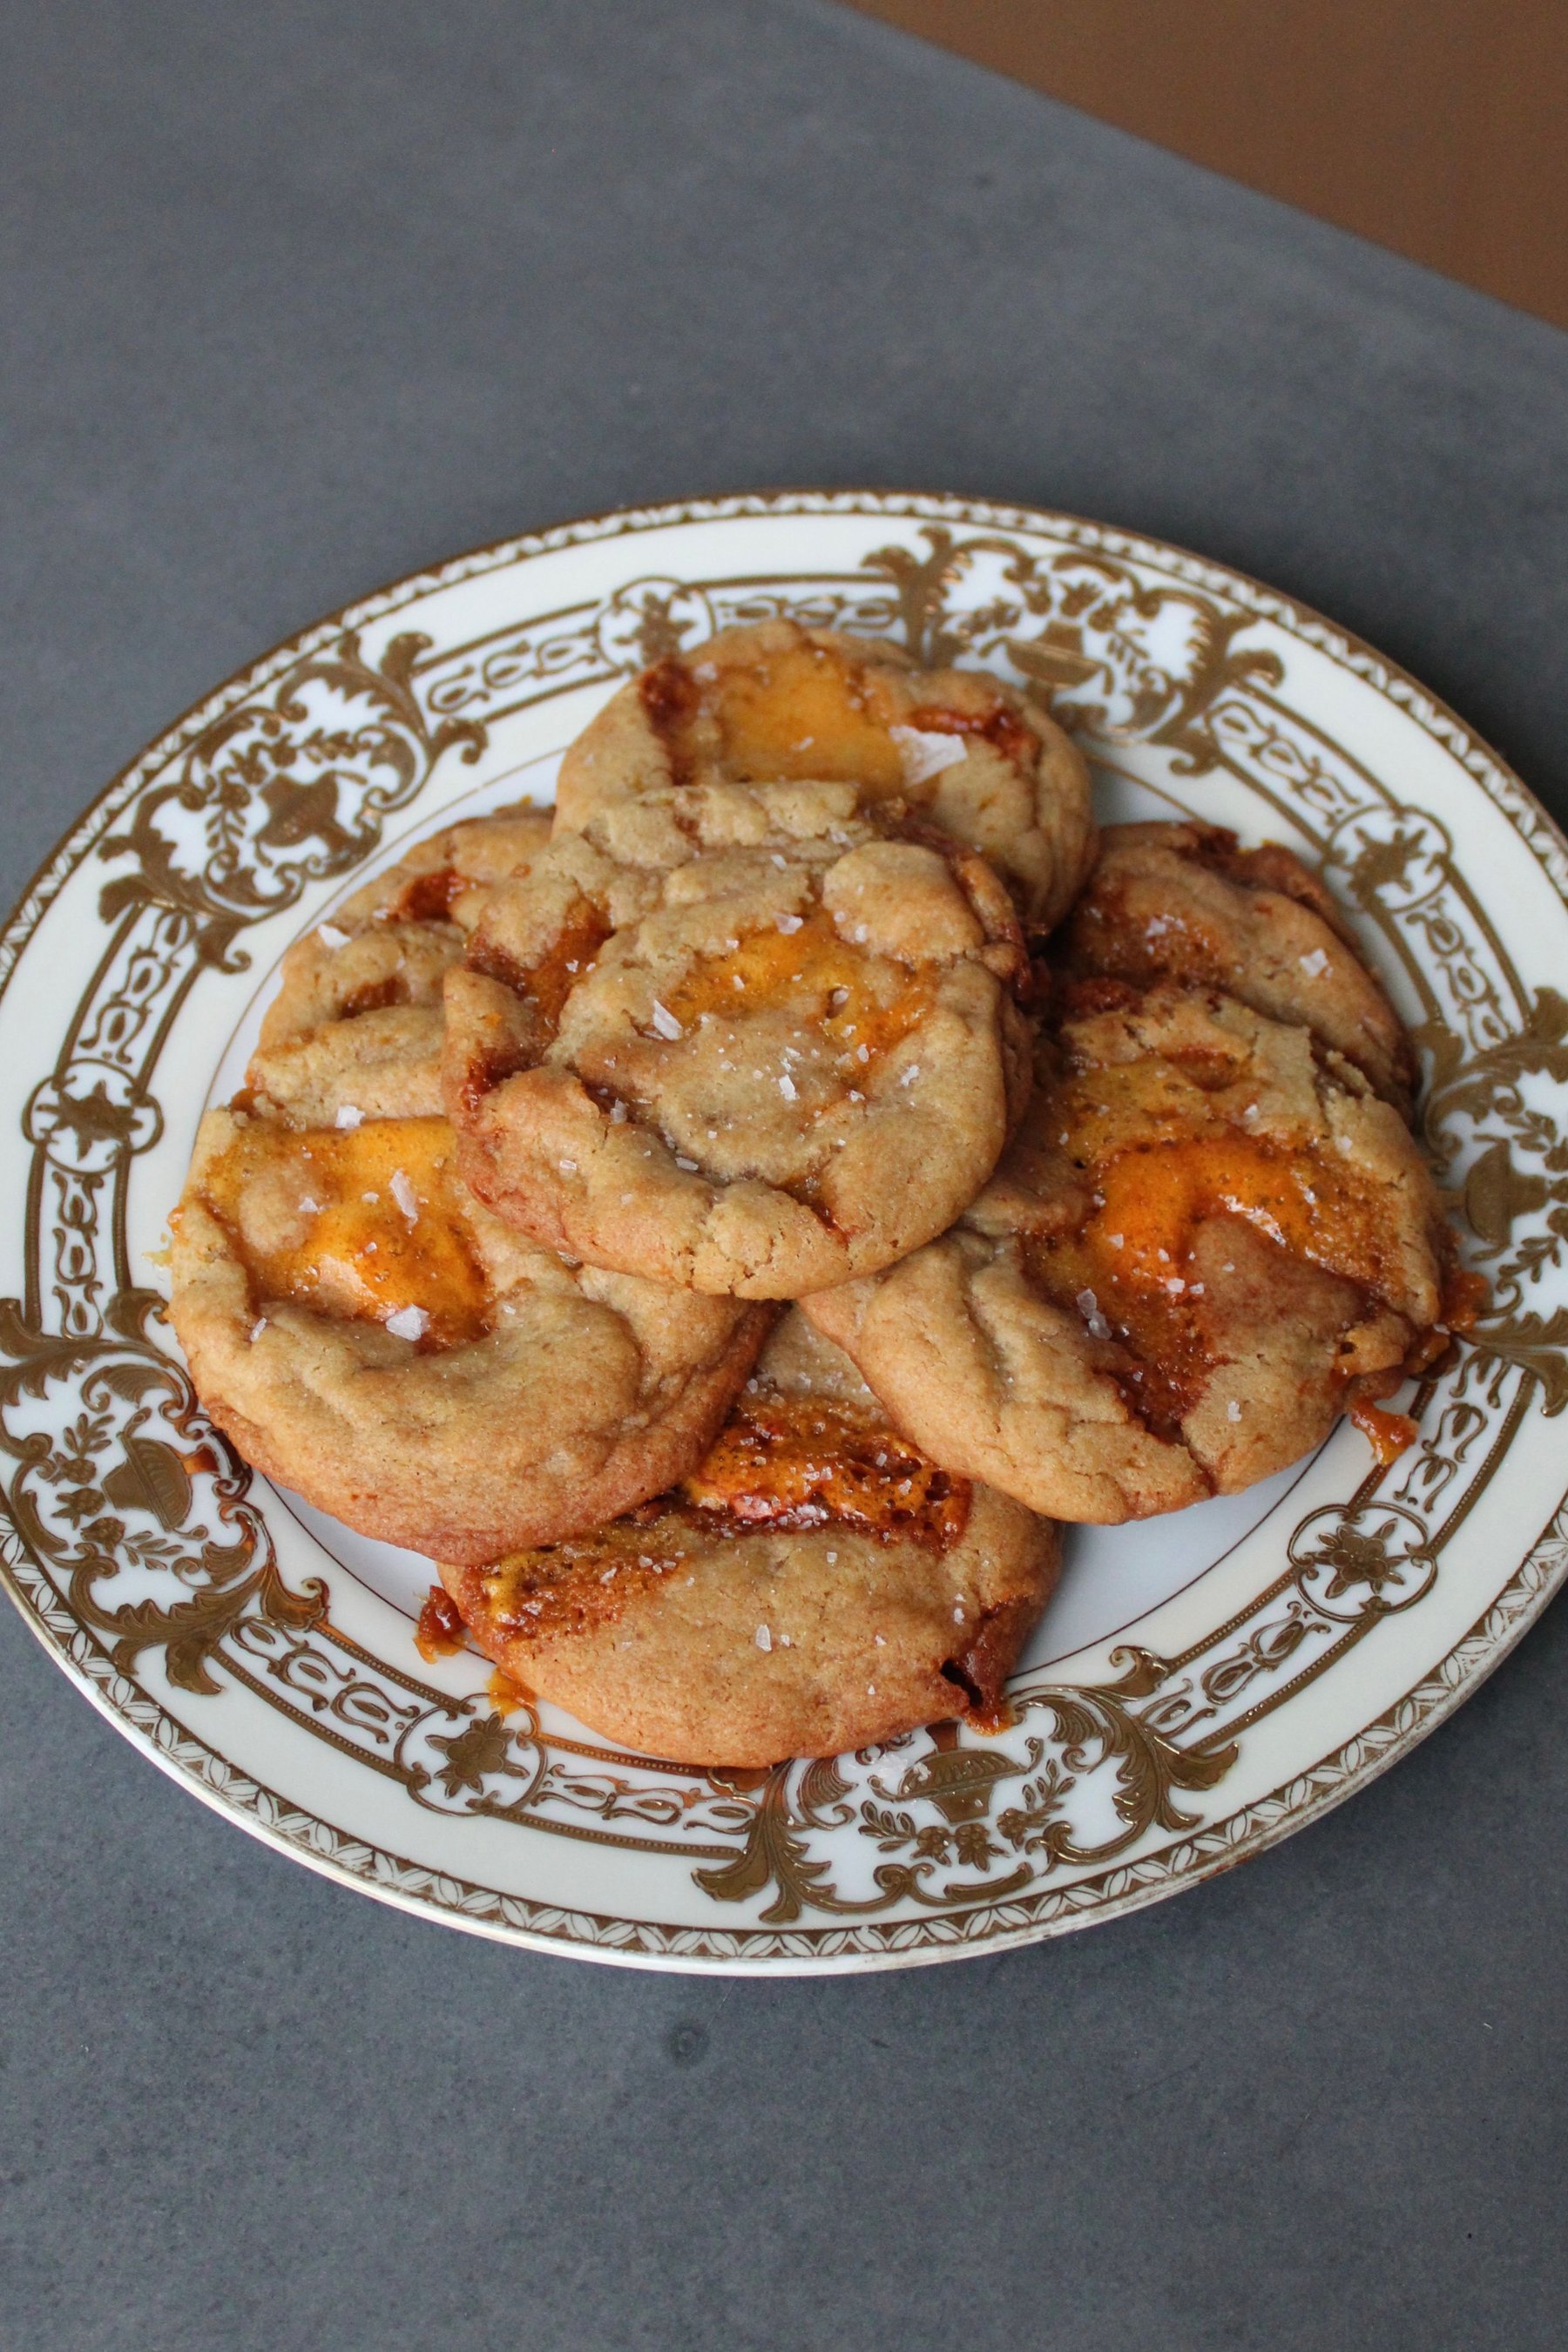
These salted brown butter honeycomb cookies have everything I want in a cookie: chewy centers, crisp caramelized edges, and little pockets of crunchy honeycomb candy throughout. The brown butter adds a deep, nutty flavor, while honey in both the candy and cookie dough gives them a subtle caramel-like sweetness. A sprinkle of flaky sea salt on top balances everything out.
The best part is the honeycomb. Some pieces melt into little caramelized pools around the edges while others stay tucked inside the cookie, giving you a mix of crisp, chewy, and crunchy textures in every bite.
Salted Honeycomb Cookies
Ingredients
Honeycomb Candy
- 100 g granulated sugar
- 50 g honey
- 25 g light corn syrup
- Pinch of salt
- ½ tsp baking soda
Brown Butter Honeycomb Cookies
- 168 g unsalted butter
- 160 g light brown sugar, packed
- 40 g granulated sugar
- 1 large egg
- 1 large egg yolk
- 2 tsp vanilla extract
- 15 g honey, about 2 tsp
- 235 g all-purpose flour
- ¾ tsp baking soda
- ¾ tsp kosher salt
- ¼ tsp ground cinnamon
- 100–120 g honeycomb candy
- Flaky sea salt, for finishing
Instructions
Make the Honeycomb Candy
- 1
Line a baking sheet with parchment paper.
- 2
Add the sugar, honey, corn syrup, and salt to a small, heavy-bottomed saucepan.
- 3
Cook over medium heat without stirring. Swirl the pan occasionally until the sugar melts. Continue cooking until the mixture reaches 300°F.
- 4
Immediately remove from the heat.
- 5
Quickly whisk in the baking soda. The mixture will foam up dramatically, so be careful.
- 6
Immediately pour the mixture onto the prepared parchment paper. Do not spread it.
- 7
Let the honeycomb cool completely, about 30–45 minutes.
- 8
Once completely cool, break it into pieces. You want a mixture of small pieces and larger chunks.
- 9
Place the honeycomb in the freezer for 20–30 minutes before using it in the cookies.
Brown the Butter
- 1
Place the butter in a light-colored saucepan over medium-low heat.
- 2
Let the butter melt and foam, stirring and scraping the bottom of the pan frequently. Continue cooking until the milk solids turn deep golden brown and the butter smells nutty and toasted.
- 3
Immediately remove from the heat and let the brown butter cool for 5–10 minutes, until warm but no longer hot.
Make the Dough
- 1
Pour the brown butter into a large mixing bowl. Add the brown sugar and granulated sugar and whisk until smooth and well combined.
- 2
Whisk in the egg, egg yolk, vanilla, and honey until the mixture is smooth and glossy.
- 3
In a separate bowl, whisk together the flour, baking soda, kosher salt, and cinnamon.
- 4
Add the dry ingredients to the butter mixture and fold together just until the flour disappears. Be careful not to overmix.
- 5
Break 70–80 g of the honeycomb into relatively small pieces and gently fold them into the dough.
- 6
Keep the remaining 30–40 g in the freezer for topping the cookies.
Chill the Dough
- 1
Cover the dough and refrigerate for at least 1 hour. You can also refrigerate it overnight. Chilling is especially important for these cookies because it gives the dough enough structure before the honeycomb begins to melt.
Bake
- 1
Preheat the oven to 350°F and line baking sheets with parchment paper.
- 2
Scoop the dough into 45–50 g portions and roll each portion into a ball.
- 3
Take the frozen honeycomb and press a few larger pieces into the top of each cookie. Try to tuck the honeycomb slightly into the dough rather than leaving a large piece completely exposed, since exposed honeycomb is more likely to melt directly onto the baking sheet.
- 4
Bake for 10 minutes, or until the edges are golden brown and the centers are puffy and still look slightly soft.
- 5
Remove the cookies from the oven. Using a round cookie cutter slightly larger than the cookies, gently scoot the edges inward to pull in any honeycomb that has oozed out and shape the cookies into circles.
- 6
Return the cookies to the oven and bake for another 2–3 minutes.
- 7
Remove from the oven, shape the cookies again with the cookie cutter if needed, and sprinkle with flaky sea salt.
- 8
Let the cookies cool on the baking sheet for 10–15 minutes before transferring them to a wire rack.
Lauren's Note
- Watch the honeycomb carefully. It goes from perfectly cooked to burnt quickly, so I recommend using a candy thermometer rather than relying on color alone.
- The honeycomb will be extremely hot when it comes out of the oven. Don't try to taste it right away.
- Keep the honeycomb cold before adding it to the cookies. Freezing the pieces helps them hold their shape a little longer in the oven.
- Make sure the brown butter has cooled slightly before adding the eggs. You want it warm, not hot, so you don't accidentally start cooking the eggs.
Frequently asked questions
Yes! The honeycomb can be made ahead and stored in an airtight container at room temperature. For these cookies, I like to break it into pieces and freeze it shortly before adding it to the dough.
I highly recommend one. The honeycomb needs to reach 300°F, also known as the hard-crack stage, for the right texture.
Yes. The dough can be refrigerated overnight. If it becomes very firm, let it sit at room temperature for a few minutes before scooping.
Store completely cooled cookies in an airtight container at room temperature for several days. The honeycomb will gradually soften over time, so they're at their crunchiest when fresh.